

Table of Contents
Vertical garden wall planter solutions have become the go-to choice for urban renters and apartment dwellers seeking a low-maintenance way to grow herbs and leafy greens in tight spaces. This guide cuts through the hype—delivering realistic advice, cost breakdowns, and hard-to-find tips on irrigation, installation, plant health, and more for anyone with limited balcony or wall space.
Key Takeaways
- Vertical garden wall planters make indoor or balcony gardening possible in small spaces, with most quality systems costing $100–$300.
- Mounting and watering are the biggest challenges—always check wall type, weight tolerance, and look for self-watering or automated irrigation features.
- Pocket kits, stackable, and modular options suit different needs; prioritize drainage, food-safe materials, and shallow-rooted plants for reliable success.
Why a vertical garden wall planter is the best fit for small spaces
In urban apartments and condos, available gardening space is often limited to a balcony or a single wall. A vertical garden wall planter maximizes your usable square footage by allowing you to grow upwards, not outwards. This approach transforms any bare wall into a fresh herb or leafy green oasis—perfect for balconies or even inside next to a sunny window. The best vertical garden apartment setups allow for regular harvests without eating up valuable floor space. Systems range in size, but plan for 2-12 square feet of growing area—compact enough for most city spaces, while still producing a surprising amount of food or greenery. Maintenance is typically weekly watering and pruning, with full wall planters requiring slightly more attention than small tiered kits. At $100–$300, they’re far more affordable than traditional landscaping or building out raised beds.
Cost breakdown & material options (what $100–$300 buys you)
The wall-mounted planter system market has matured fast, with most quality vertical garden wall planter kits falling into three price bands:
- $100–$150 (Budget): Primarily plastic or composite pocket kits, or basic stackable wall planters. Best for renters or first-timers. Look for food-grade, BPA-free polypropylene for edibles (see source).
- $150–$220 (Midrange): Modular living wall indoor panels and wood or metal planters, offering greater customization and durability. Lighter composites and aluminum options balance sturdiness with easier installation (important for apartment walls) (source).
- $220–$300 (High-end/Automated): Living-wall systems with built-in drip irrigation, self-watering reservoirs, or smart water sensors. Often use ceramic, stainless, or pre-vegetated panels. These add convenience but more weight—always check wall rating and anchor quality.
Heavier materials (ceramic, real wood, or thick metal) offer durability but require stronger anchors and may not suit renters. Plastics and composites keep weight manageable for indoor or balcony walls—a must if you can’t drill into supporting studs. Confirm the kit uses food-safe materials if growing anything edible.
Mix and match pocket sizes or choose systems with deeper modules to support a wider range of plants. Soil in shallow pockets dries out faster (source), so adjust your plant choices or watering routine accordingly.
Installation & load considerations for apartments and balconies
Before setting up any wall-mounted planter system, check your wall type (drywall, block, brick, or railings). Drywall on most apartment interior walls won’t support the weight of a fully loaded vertical garden; use masonry anchors for brick/concrete, or anchor to wood studs if possible. For railings or balcony walls, opt for lightweight kits or hook-on stackable planters rather than heavy modules. Always distribute the load evenly (source)—never overload one section. Each square foot of soil and plants can weigh 5–10 pounds when wet. Some property managers require pre-approval for wall mounting; check your lease and consider systems with minimal drilling or removable hardware for easier move-out.
If unsure, consult a local handyman or building engineer—especially for full-length living wall systems. DIY anchor kits are cheap but only as strong as your installation.
Drainage, soil mix, and plant-health pitfalls (and how to prevent them)
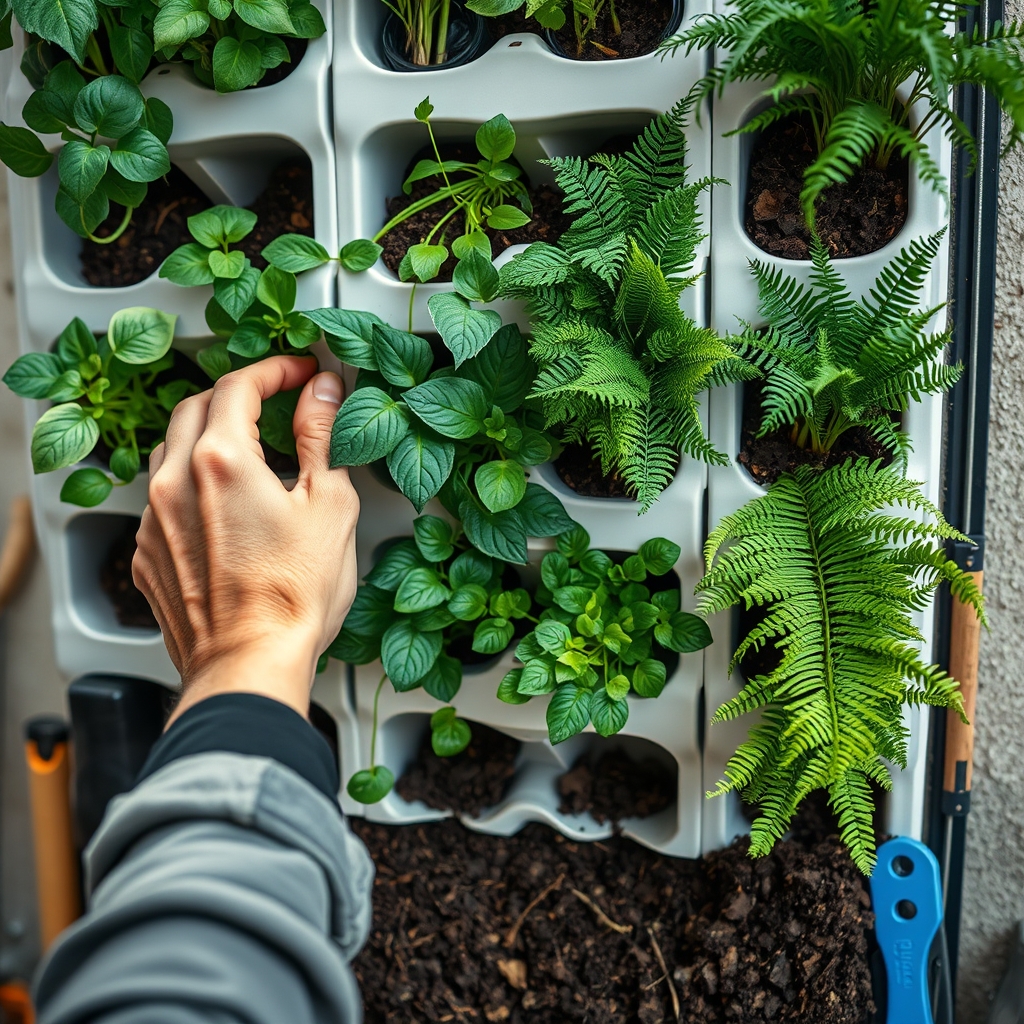
Drainage is the single biggest plant-killer in vertical garden systems. Without it, pockets become waterlogged, leading to root rot and pests. Choose pocket planter wall kits and indoor outdoor vertical garden systems with clear drain holes and a removable tray or catchment for water runoff. For best results, use a high-quality potting mix with perlite or coco coir—never use soil straight from the ground. The mix should retain moisture but never stay soggy. Many vertical garden designs—especially cheaper pocket kits—are notoriously shallow, which stresses roots and limits your plant variety (source). Stick to shallow-rooted herbs (basil, parsley, cilantro, mint) and avoid taproot veggies or large fruiting plants. Overcrowding causes root-bound plants and rapid nutrient exhaustion, so follow manufacturer spacing guidance.
Common problems:
- Poor drainage → root rot, pests
- Pockets too shallow → stunted growth, weak plants
- Soil dries too fast → wilting
Many prebuilt indoor outdoor vertical garden systems now include layered drainage fabric or irrigation mats—these are worth a few extra dollars for hands-off reliability.
Irrigation & automation for small spaces — the missing feature many competitors skip
This is where many off-the-shelf wall-mounted planter systems fall short—especially cheaper options. Most pocket and stackable kits require manual watering, which quickly becomes tedious (and easy to forget). Look for features like:
- self-watering modules or wicking reservoirs
- Flexible drip irrigation lines with simple timer setups (around $30–$50 DIY add-on)
- Reservoir-based pocket planter wall kits that distribute water evenly from the top down
- Bluetooth or smart water sensors for remote reminders (best for tech-savvy renters)
Automated watering isn’t just for high-end systems. Even the most basic indoor outdoor vertical garden system can work with a small, easy-to-hide drip kit connected to a balcony spigot or refillable tank (check your apartment’s water access and spigot policy). Systems with built-in irrigation are a game-changer if you travel or often forget routine chores. Top competitors often lack these features, so it’s worth paying extra or DIYing them (source).
For outdoor gardeners looking to save water and reduce bills, see this actionable guide: 7 Best Ways to Cut Water Bills. The lessons apply directly to small balcony garden automation.
Best plants and layout strategies for balconies and apartments
Not every plant is suitable for a vertical garden apartment. Herbs and shallow-rooted greens are your best friends, including:
- Basil, mint, oregano, thyme, cilantro, parsley
- Leafy greens: baby lettuce, arugula, chard, spinach, mustard greens
- Small-fruiting plants (cherry tomatoes, strawberries) if pockets are at least 6 inches deep
Plan your vertical herb garden balcony based on sun exposure. South-facing walls support veggies and fruiting crops thanks to maximum sunlight. East or west exposures work best for leafy greens and herbs (source). Avoid species with deep taproots—most systems aren’t built for them (source).
Mix pockets or planter sizes within your layout to accommodate different plant needs and stagger harvests. If you want easy biophilic integration, there are some excellent ideas in our biophilic outdoor design guide.
Product types compared: pocket kits, modular panels, stackable planters, pre-vegetated systems
| Type | Description | Pros | Cons | Best For |
|---|---|---|---|---|
| Pocket planter wall kit | Fabric or plastic pouches that mount directly to a wall or railing | Very affordable, lightweight, simple install | Shallow pockets, limited plant selection, can dry quickly | Renters, herb gardeners, balconies |
| Modular living wall indoor panels | Interlocking plastic/composite/metal panels, customizable layouts | Scalable, offers deep pockets, often supports irrigation | Higher cost, extra weight, more effort to install | Homeowners, committed gardeners |
| Stackable wall planters | Plastic or wood trays/boxes that stack vertically, often freestanding or wall-mounted | Flexible, easy to rearrange, better root space | Midweight, some may need brackets or rail | DIYers, small fruit/vegetable growers |
| Pre-vegetated panels/systems | Living wall system—panels come pre-planted for instant green effect | Instant results, professional finish, often automatic watering | Expensive, heaviest, harder to relocate | Luxury builds, property owners |
As noted by researchers (source), living wall systems come in several formats—choose based on whether you plan long-term or want to take your setup with you when moving apartments. Pocket depth limitations are the main weakness for most off-the-shelf kits.
Quick troubleshooting & maintenance checklist (monthly/seasonal)
Avoiding common pitfalls is key to a low-maintenance indoor outdoor vertical garden system. Bookmark this checklist:
- Blocked drainage? Flush pockets/top trays monthly. If water pools or drips, clean holes with a skewer or pipe cleaner.
- Uneven watering? Check for dry spots weekly. Rotate plants or adjust irrigation emitters as needed.
- Root crowding? Thin plants or repot at least every 3–6 months. Overfilled pockets lead to competition and stunting.
- Pest outbreaks? Inspect leaves bi-weekly for aphids, spider mites. Remove infested plants or treat with insecticidal soap.
- Structural loosening? Inspect and tighten brackets or anchors every season, especially after heavy watering or storms.
Consistent monitoring allows you to catch problems early—saving plants and money in the long run.
Buying checklist & decision flow (how to pick your system)
- Measure your available wall or railing area. Prioritize areas with at least 4–6 hours of direct sunlight for edibles.
- Choose a material (plastic/composite for light weight; wood/metal for durability) and confirm food-safe status if growing herbs or produce.
- Decide if manual watering is okay—otherwise, select a kit with self-watering or compatible with DIY drip irrigation.
- Check pocket/grow module depth (4 inches minimum for most herbs and greens; deeper for larger plants).
- Review your wall type and weight limits. Buy appropriate mounting hardware, anchors, or brackets.
- Compare warranties, return policies, and price bands—expect to spend $100–$300 for a robust system.
If you want even more tips for organizing and making the most of small spaces, check out DIY floating shelves for kitchens or our garage organization systems guide.
DIY budget options & quick cost-saving hacks
Don’t want to shell out $150+ for a vertical garden apartment system? Budget DIY alternatives offer flexibility and ultimate custom fit. For example:
- Welded wire mesh: $35 for a 3’x50’ roll; attach to a few $4 T-posts or balcony railing (source). Use zip ties and assorted recycled planters or pots.
- Repurposed shoe organizers: Hang on doors or balcony rails to create a pocket planter wall kit for almost nothing.
- Upcycle plastic bottles or old storage bins: Cut drainage holes and mount to a wooden plank or fence panel.
DIY works best for renters and those who prefer a custom look, but be aware you’ll have to rig your own drainage and irrigation—kits are most attractive for plug-and-play setup. For more on cost-effective outdoor improvements, see our backyard privacy ideas or outdoor kitchen cost guide.
FAQ & final recommendation
What is the best value vertical garden wall planter kit for renters?
Look for modular plastic pocket kits or stackable wall planters with removable hooks—ideally those using food-grade BPA-free polypropylene. Brands that offer included rail hanging hardware are easiest. Check return and move-out policies first.
What features must a wall-mounted planter system have for urban apartments?
Essentials: built-in or retrofittable drainage, food-safe materials for edibles, secure mounting system for your specific wall type, and ideally a self-watering or irrigation-ready design. Lightweight options are best for easy install and safe removal.
How long does installation typically take?
Expect 30–60 minutes for small pocket kits, and 1–2 hours for larger modular or pre-vegetated systems. Add extra time if complex anchoring is needed or for high-up balcony installations.
Is automated watering worth the extra cost in small apartment setups?
Yes, especially if you travel or work long hours. Many competitors skip this, but self-watering modules or basic drip kits can pay for themselves by preventing plant loss from missed waterings.
Can I grow vegetables or just herbs in these systems?
Most vertical garden wall planters excel at herbs and shallow leaf crops. For vegetables, pocket depth is critical—look for 6 inches or deeper for cherry tomatoes or strawberries. Avoid root crops or large fruiting varieties in basic pocket kits.
In summary, a vertical garden wall planter empowers city dwellers to grow food or greenery in the tightest spaces, for a reasonable investment and minimal hassle. Choose the right system for your space and wall type, prioritize drainage and irrigation, and stick to plants suited to pocket depth. With the right care, your vertical garden apartment will stay lush—no matter how small your balcony or how busy your lifestyle. Ready to upgrade your space? Browse top-rated kits and get growing today.
How to Install and Optimize Your Vertical Garden Wall Planter (Detailed Guide)
Ready to set up your vertical garden wall planter? Follow these actionable steps for a stress-free installation and thriving apartment garden.
- Step 1: Choose the wall or balcony rail with the best light. South-facing is ideal for veggies; east or west is fine for most herbs and greens.
- Step 2: Measure available space—including height and width. Ensure you leave 3–6 inches between panels or planters for airflow.
- Step 3: For wall installs, find wall studs or use masonry anchors. For railings, select kits with secure hook systems.
- Step 4: Install the mounting brackets, hooks, or support structure. Test load capacity with a bag of soil before planting.
- Step 5: Prepare a moisture-retaining potting mix (add perlite or coir). Fill pockets or trays—don’t overpack.
- Step 6: Plant herbs or greens according to root depth. Label or map out your layout for easy harvest.
- Step 7: Hand-water thoroughly the first time to check for leaks and good drainage. If using self-watering or drip, test for even flow in all pockets.
- Step 8: Set a calendar reminder for regular watering and monthly maintenance.
For a premium upgrade, add a battery-powered drip irrigation timer that connects to your outdoor spigot—or a gravity-fed tank for spaces with no water supply. Low-cost Bluetooth soil sensors take out the guesswork for plant health, making your system almost “set and forget.”
—